In this tutorial, I will explain how to install WordPress on localhost in 5 easy steps. WordPress comprises 60% of websites on the internet. Learning WordPress is easy and fun. WordPress is a CMS (Content Management System) which allows you to create a website also. Today, WordPress is being used by top organizations, celebrities, government organizations, etc. For example, our prime minister’s website is made up of WordPress. Similarly, IBPS, Facebook Newsroom, Microsoft Newsroom, etc are some of the known names whose websites are on WordPress. So, .
5 Steps on how to Install WordPress on Localhost
The 5 steps that we will be going to discuss in this post are:
- Downloading the latest version of WordPress.
- Download XAMPP (Software for creating localhost on your system)
- Install and Run XAMPP.
- Creating a Database.
- Installing the WordPress on Localhost.
What is Localhost and why to install WordPress on local host?
Let’s understand this from the basics. To create a website, you need two things, i.e. Domain and Hosting. Hosting is the space in the virtual world (Internet) where your website is present or hosted. This space is usually presented on servers. It means to host a website, we need some space on the server. Now, to reach this website on Internet, we need an address. The domain is the address that takes users from any part of the world to the server where our website is hosted.
When your website is hosted on the server, it is visible to every user who searches for it. If you want to learn the basics and test the output before going live on the internet, localhost is the best option. Localhost makes your system the server that hosts your website. Once you are done with the website testing process and satisfied with the final outcome, you make your site live.
How to Install WordPress on Localhost?
Installing WordPress is very easy in both the case, i.e. Cpanel and localhost. If you are planning to install WordPress through Cpanel, please read the domain and hosting: Easy steps to purchase, after which you can install WordPress from Cpanel. In this post, I will explain how to install WordPress on localhost.
There is various software in the market that helps you to install WordPress on localhost. In this tutorial, I will be using XAMPP for installing WordPress on localhost.
To run a WordPress site, we need three things: Server, programming language, and database. XAMPP creates these three things on your PC using web server software APACHE, PHP, and MSQL.
Apache is a web server application. PHP is the programming language, and MSQL is a database management solution. PHP and MYSQL is required to run a wordpress website.
Step 1: Download the Version of WordPress
To download the latest version of wordpress:
- Go to the Official Website of WordPress, and click on the “Get WordPress” Button.
- Click on the download wordpress button.
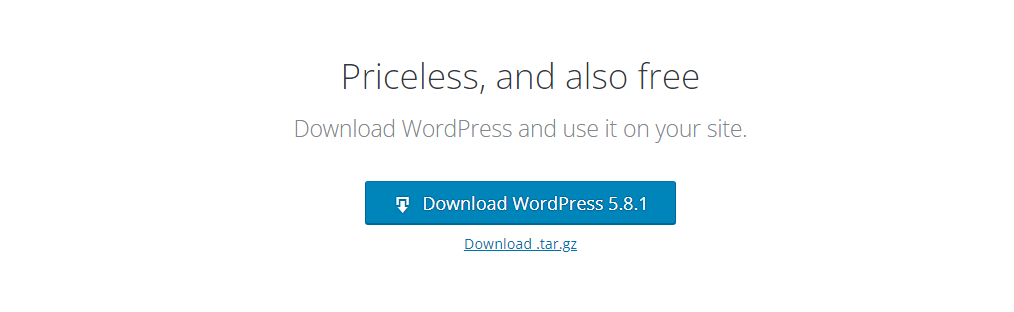
The zip file will be downloaded in a few minutes. Now, let’s move to the next step.
Step 2: Downlaod XAMPP
- Go to the official XAMPP’s Website. Choose your operating system and download the software.
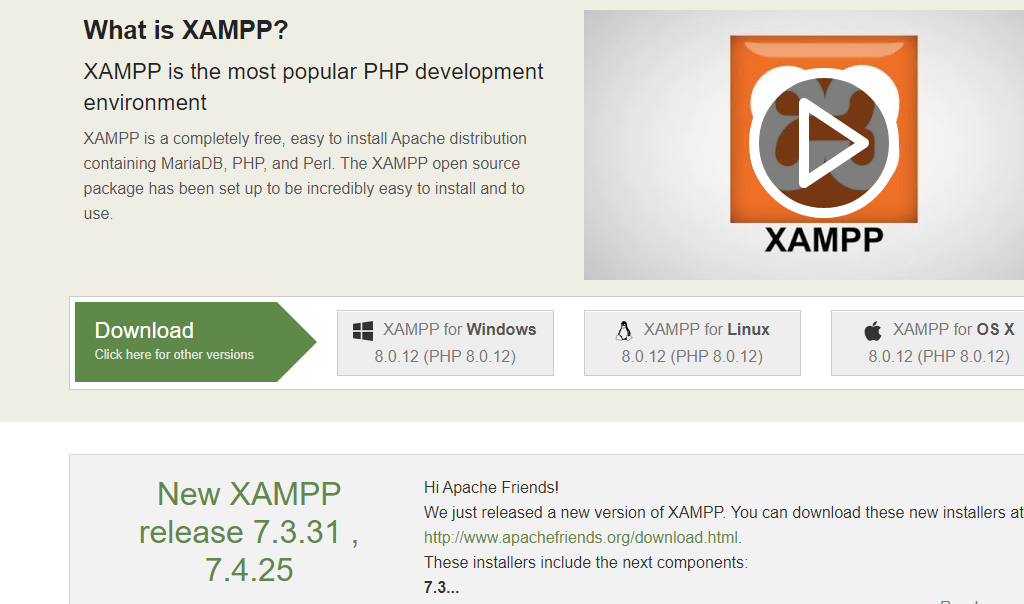
XAMPP has different versions for different operating systems. Choose the one which is applicable to you.
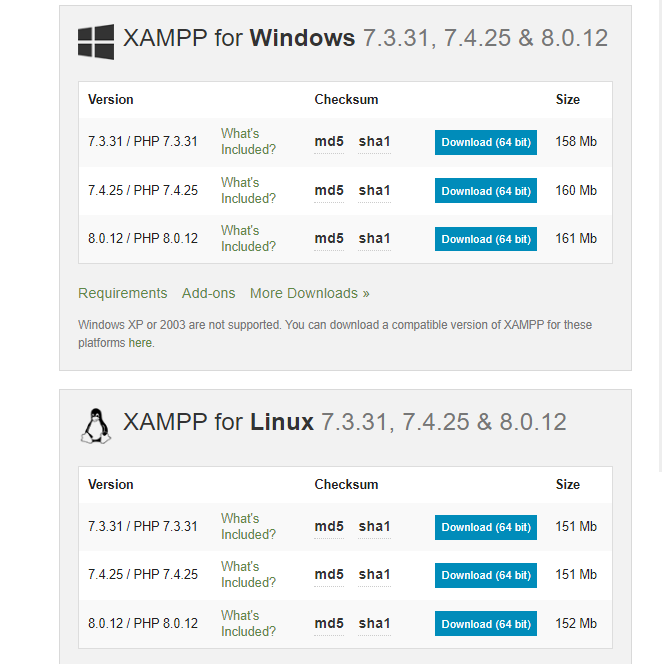
Click on the download button and wait for some time to download the software.
Step 3: Install and Run XAMPP
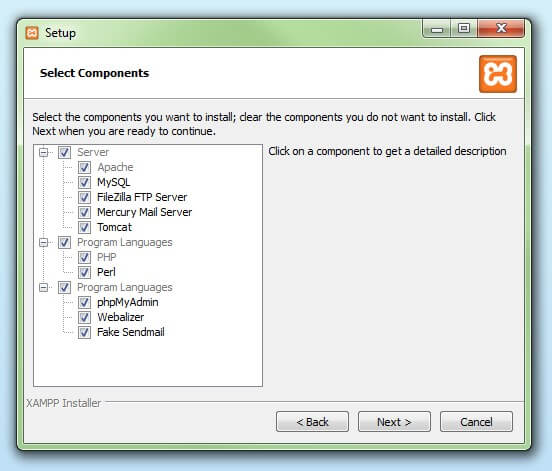
- After downloading the XAMPP, unzip it. When the file is ready, proceed with the installation process. Click on the install button. and follow the steps.
- Now a dialog box will open, which shows some checkboxes that are already checked. You can check the checkboxes that your require and then click on next. (If you are not sure which checkbox to check or uncheck, keep Apache, MYSQL in Server, PHP, and phpMyAdmin in Program Language checkboxes checked.)
- After that, choose the installing drive where you want to install the software. Please name the folder with xampp so that you can identify the folder in the drive.
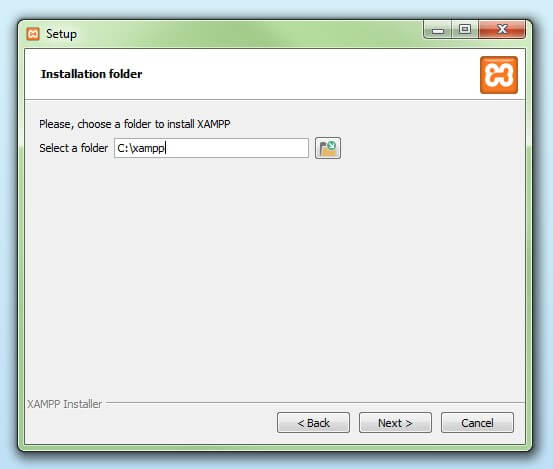
- After selecting the drive, click on the NEXT button. The installation process will be started.
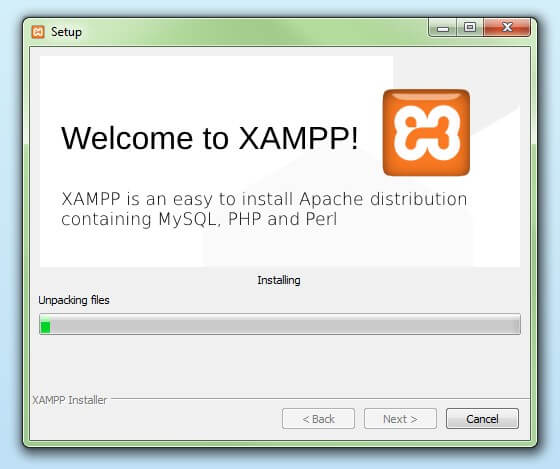
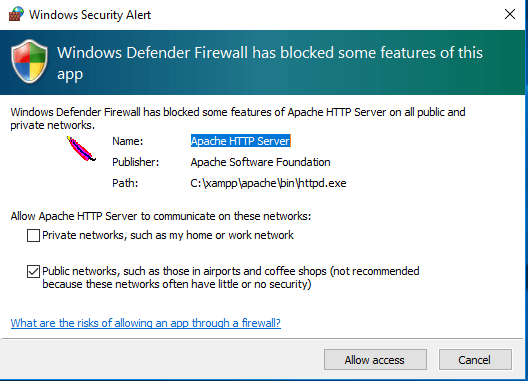
- You will see a security alert if you have any antivirus installed on your system. Don’t worry about it, check any of the options and click on Allow Access.
- Now you are at the end of the installation process. Click on Finish to complete the installation.
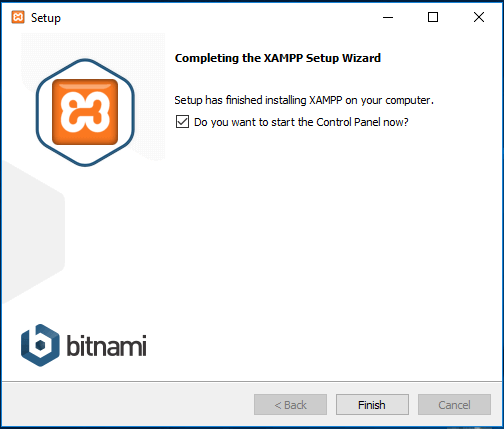
Congratulations! XAMPP has been installed successfully on your system.
Step 4: Creating a Database
To create a database, first, we need to create a folder where all the data of the website will be stored:
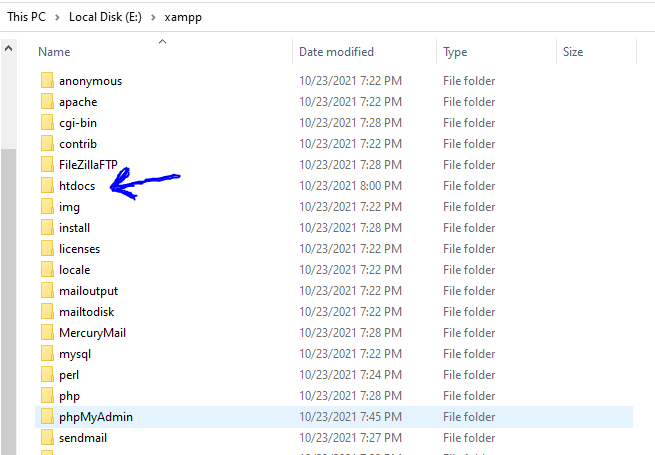
- Go to the drive where you have saved the xampp folder.
- Select the “htdocs folder” and paste the wordpress folder which we have downloaded in first step. (Unzip the wordpress folder here after pasting.)
- After unzipping the wordpress folder in htdocs, rename the unzipped wordpress folder with the name of the site that you want to create. For this tutorial, I have renamed the folder with “demowebsite”.

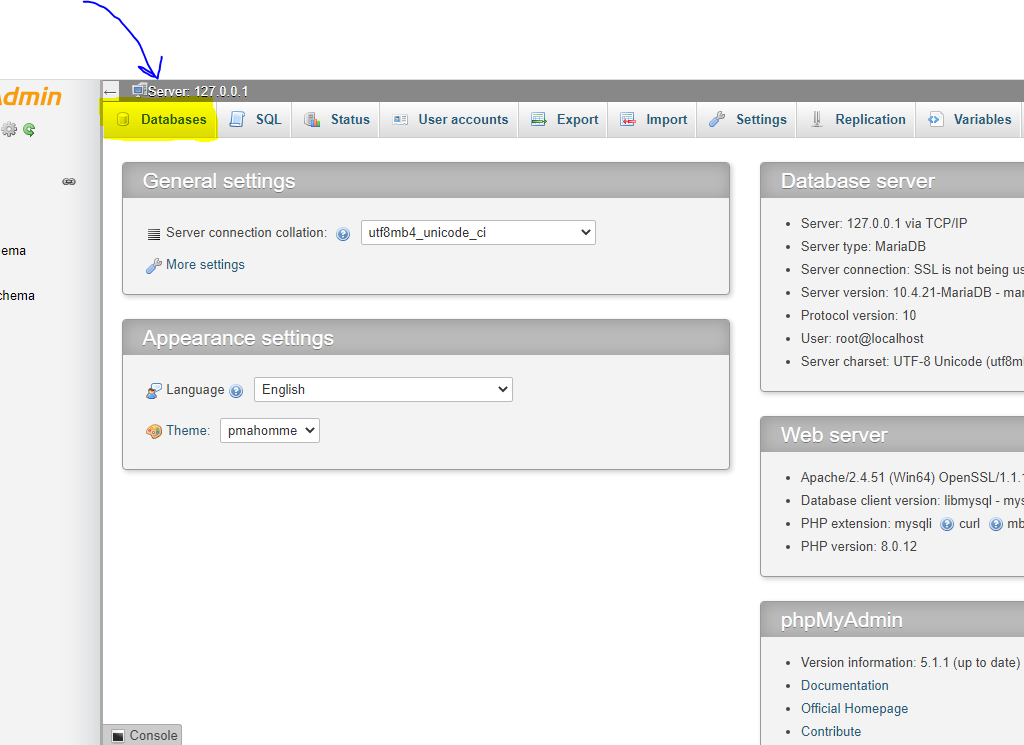
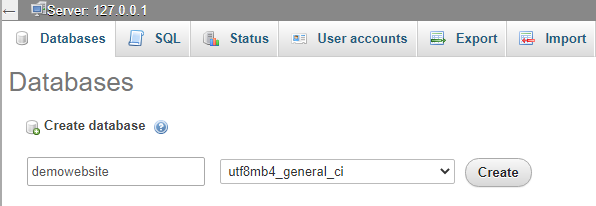
- Now open a new tab on your browser and search for localhost/phpmyadmin

- Now select the database option on the top menu option.
- Write the same name for database that we had entered for the wordpress folder in htdocs. It means we are creating database for the same website, so the database needs to be same as of the website. Click on create button, your database will be created within seconds.
Congratulations! You have successfully created database for your website. Now is the final step to install wordpress on the localhost.
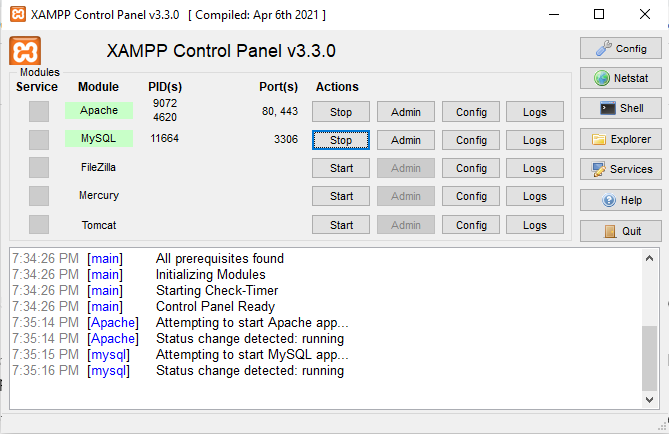
Note: Before installing the wordpress on localhost, we need to start Apache server and MySQL database from the XAMPP control panel. Without starting it, we will not be able to access phpmyadmin.
To start both options, go the folder where XAMPP is installed. Select the XAMPP control panel, and start Apache and MySQL.
Step 5: Installing the WordPress on Localhost
Open a new tab on the browser and type localhost/websitename (“demowebsite” in my case)

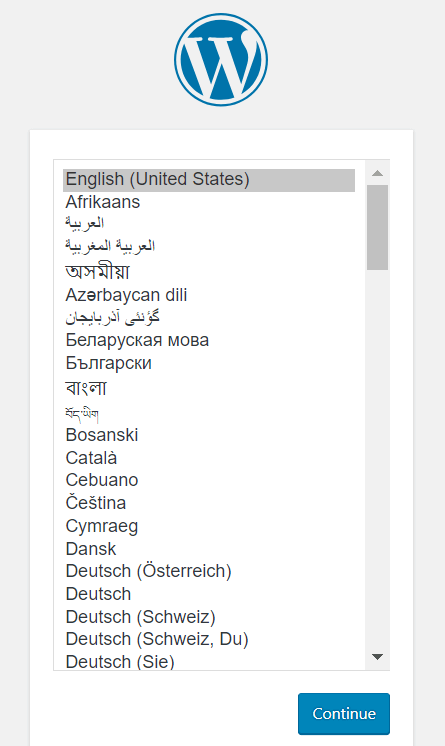
Press enter button and wordpress set up installation window is opened.
- Select the language and click on continue.
You will see a welcome message from wordpress, where it will show you the required fields in the next step. Click on let’s go button.

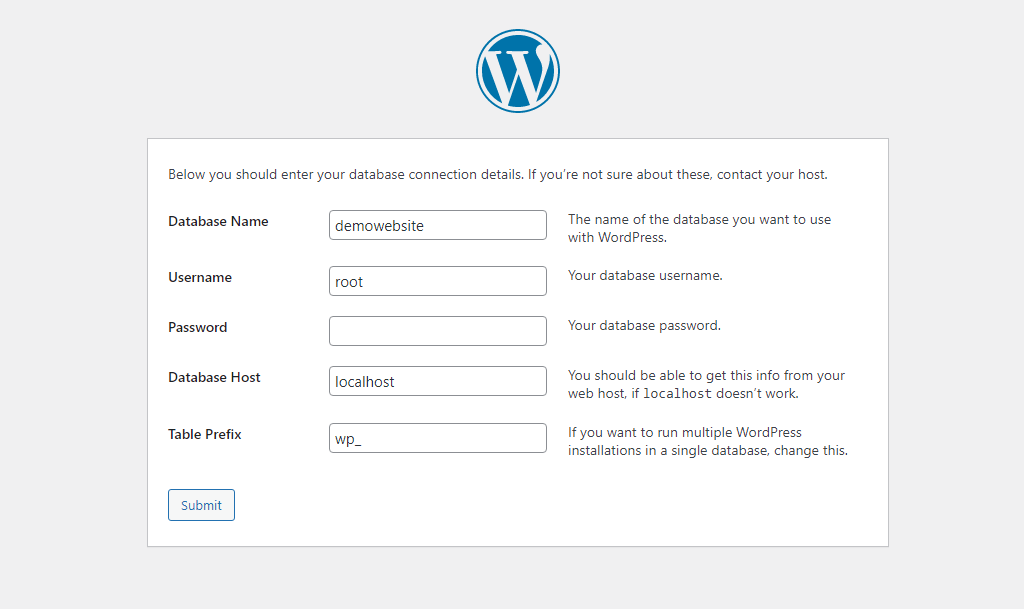
- Write your website name in database username (“demowebsite” in my case).
- In Database username, type “root”. Leave the password section blank (as we did not create any password during database creation).
- Leave other fields as it is and click submit.
When you click the submit button, a new dialogue box will open which ask you to run the installation process. This is final step for wordpress installation.
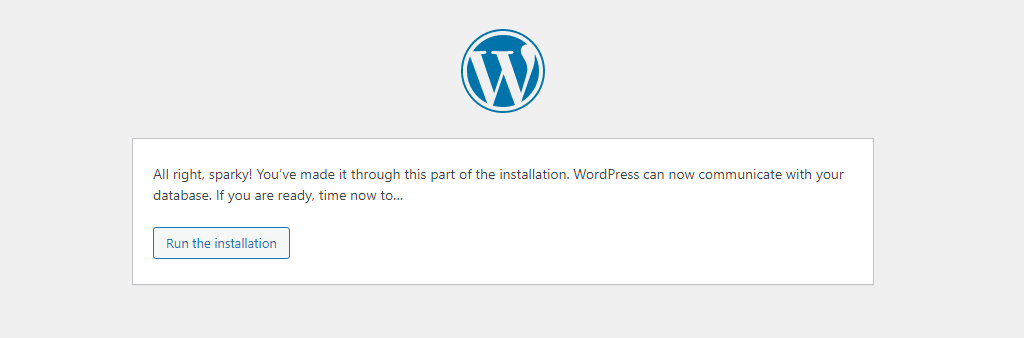
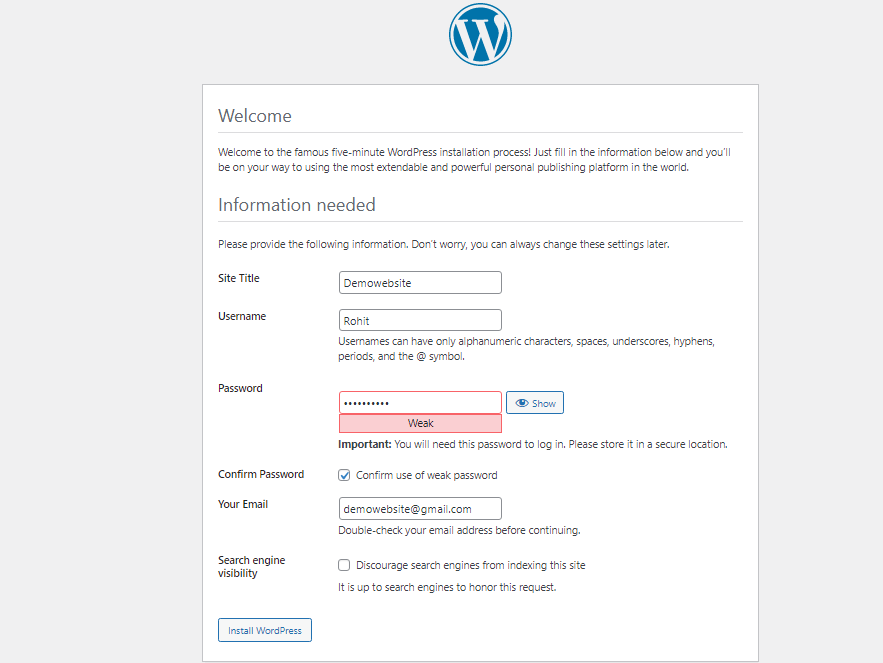
Enter your site title, username, password, and email address to complete the installation process.
Hurray! You have successfully installed the wordpress on your system. You will the confirmation message like this after successful installation.

Let’s check the site that we have just installed now!
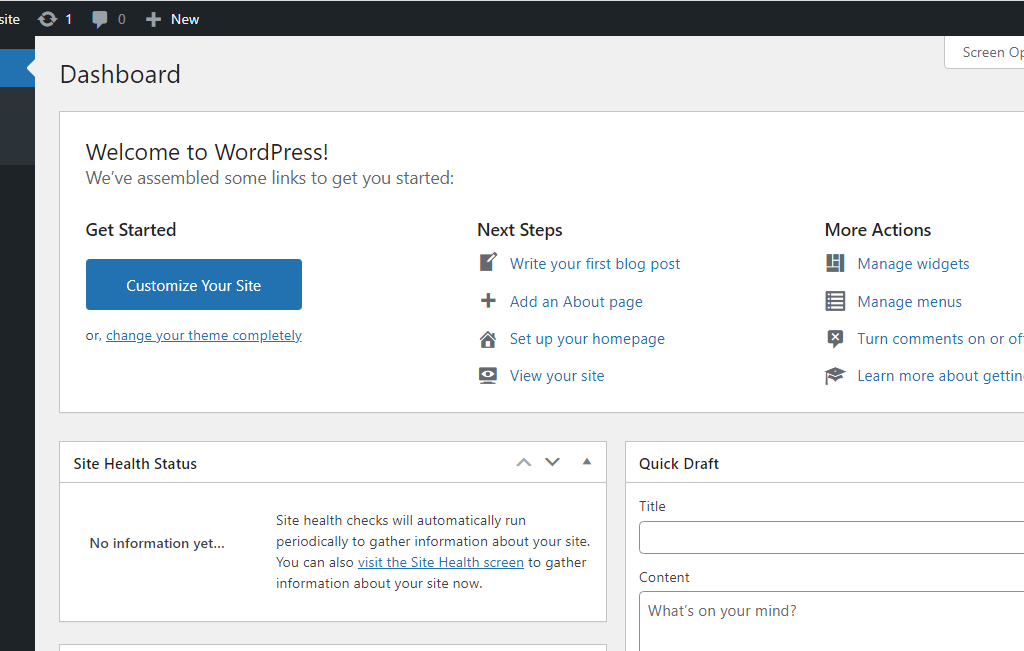
After you click on log in, you will be redirected to the dashboard of your wordpress, which looks like this.
I know you might be getting a question, that how will i login when I close my system and start it again or restart the browser? Right?
To login your localhost website, open new tab and type localhost/demowebsite/wp-admin (“write your website name in your case), like in the example below.

Now press enter and you will get a new window which ask you to enter your login details.
I hope now you are clear about how to install wordpress on local in 5 easy steps. If you want to know how to switch this local host website to online, then comment below.
Thank You.